I decided to learn Elixir in 2025. So the first thing that I want to do is to create a devcontainer.
A default devcontainer for Elixir is not provided in VSCode. So I created my own simple devcontainer.
Create necessary files
VSCode requires an entry point to start a devcontainer. Create the following two files.
.devcontainer/devcontainer.json.devcontainer/Dockerfile
devcontainer.json is loaded first and the image is built according to the Dockerfile.
Content of Dockerfile
We should first check whether an official Docker image exists. The official docker image can be found here.
Since the latest version was 1.18.0 as of 2024-12-30, the simplest setup looks as follows.
FROM elixir:1.18.0However, the docker image doesn’t contain the user vscode and thus I got the following error message.
Error response from daemon: unable to find user vscode: no matching entries in passwd file
Error: failed to start containers: 8cf375eff806234374de4501a8d74ae05541c34048b15b7aceff19bc9852eb72
We can find a VSCode doc to create a non-root user here.
Let’s add the lines to our Dockerfile. The final content is as follows.
FROM elixir:1.18.0

ARG USERNAME=vscode
ARG USER_UID=1000
ARG USER_GID=$USER_UID

# Create the user
RUN groupadd --gid $USER_GID $USERNAME \
    && useradd --uid $USER_UID --gid $USER_GID -m $USERNAME \
    #
    # [Optional] Add sudo support. Omit if you don't need to install software after connecting.
    && apt-get update \
    && apt-get install -y sudo \
    && echo $USERNAME ALL=\(root\) NOPASSWD:ALL > /etc/sudoers.d/$USERNAME \
    && chmod 0440 /etc/sudoers.d/$USERNAME \
    # Clean up
    && apt-get autoremove -y \
    && apt-get clean -y

USER vscode
Excecute Dev Containers: Rebuild and Reopen in Container.
Note that Dev Containers: Reopen in Container command doesn’t rebuild the image. It means that the change is not reflected to the result.
Content of devcontainer.json
The next step is to create devcontainer.json. Since we want to use our own Dockerfile, we need to set "dockerfile": "Dockerfile".
{
    "name": "Elixir-dev",
    "build": {
        "dockerfile": "Dockerfile"
    },
    "runArgs": [
        "--cap-add=SYS_PTRACE",
        "--security-opt",
        "seccomp=unconfined"
    ],
    "customizations": {
        "vscode": {
            "settings": {
                "terminal.integrated.defaultProfile.linux": "bash"
            },
            "extensions": [
                "jakebecker.elixir-ls"
            ]
        }
    },
    "remoteUser": "vscode"
}
You can add your desired extensions in customizations/extensions.
Version check
Execute elixir --version whether it works well. If it shows the version, the container works well.
$ elixir --version
Erlang/OTP 27 [erts-15.1.2] [source] [64-bit] [smp:4:4] [ds:4:4:10] [async-threads:1] [jit:ns]

Elixir 1.18.0 (compiled with Erlang/OTP 27)
Hello World
Let’s create a file src/hello_world.ex and add the following content.
IO.puts("hello world")Then, execute the following command.
$ elixir src/hello_world.ex
hello world
hellow world was shown on the terminal.
Adding Phoenix dependencies
We need to add the following command to install Phoenix.
USER vscode

# Add the following

# Install Phoenix
EXPOSE 4000
ARG PHOENIX_VERSION="1.7.18"
RUN mix local.hex --force \
  && mix local.rebar --force \
  && mix archive.install --force hex phx_new ${PHOENIX_VERSION}
Since Phoenix uses port 4000 by default, we need to expose the port to check it from the host.
Elixir was installed for the user vscode. Therefore, Phoenix must be installed for the same user.
If you don’t want to use USER vscode, you can write the command in the following way instead. The command is executed for the specified user by su ${USERNAME} -c.
RUN su ${USERNAME} -c "mix local.hex --force \
  && mix local.rebar --force \
  && mix archive.install --force hex phx_new ${PHOENIX_VERSION}"
mix local.hex installs a tool called hex that is a package manager for Erlang.
mix local.rebar installs a Erlang build tool called rebar3.
mix archive.install hex phx_new installs hex and phx.new globally so that we can use them anywhere.
Start a server
We haven’t installed PostgreSQL which is used by Phoenix by default but we don’t need it for testing. So let’s create a new web project under web directory in the following way. --no-ecto option. Database related config is removed with this option.
mix phx.new web --no-ectoWe are ready to go!! Change the directory and start the server.
$ cd web
$ mix phx.server
Compiling 14 files (.ex)
Generated web app
[error] `inotify-tools` is needed to run `file_system` for your system, check https://github.com/rvoicilas/inotify-tools/wiki for more information about how to install it. If it's already installed but not be found, appoint executable file with `config.exs` or `FILESYSTEM_FSINOTIFY_EXECUTABLE_FILE` env.
[warning] Not able to start file_system worker, reason: {:error, :fs_inotify_bootstrap_error}
[warning] Could not start Phoenix live-reload because we cannot listen to the file system.
You don't need to worry! This is an optional feature used during development to
refresh your browser when you save files and it does not affect production.

[info] Running WebWeb.Endpoint with Bandit 1.6.1 at 127.0.0.1:4000 (http)
[info] Access WebWeb.Endpoint at http://localhost:4000
[watch] build finished, watching for changes...

Rebuilding...

Done in 670ms.
[info] GET /
[debug] Processing with WebWeb.PageController.home/2
  Parameters: %{}
  Pipelines: [:browser]
[info] Sent 200 in 160ms
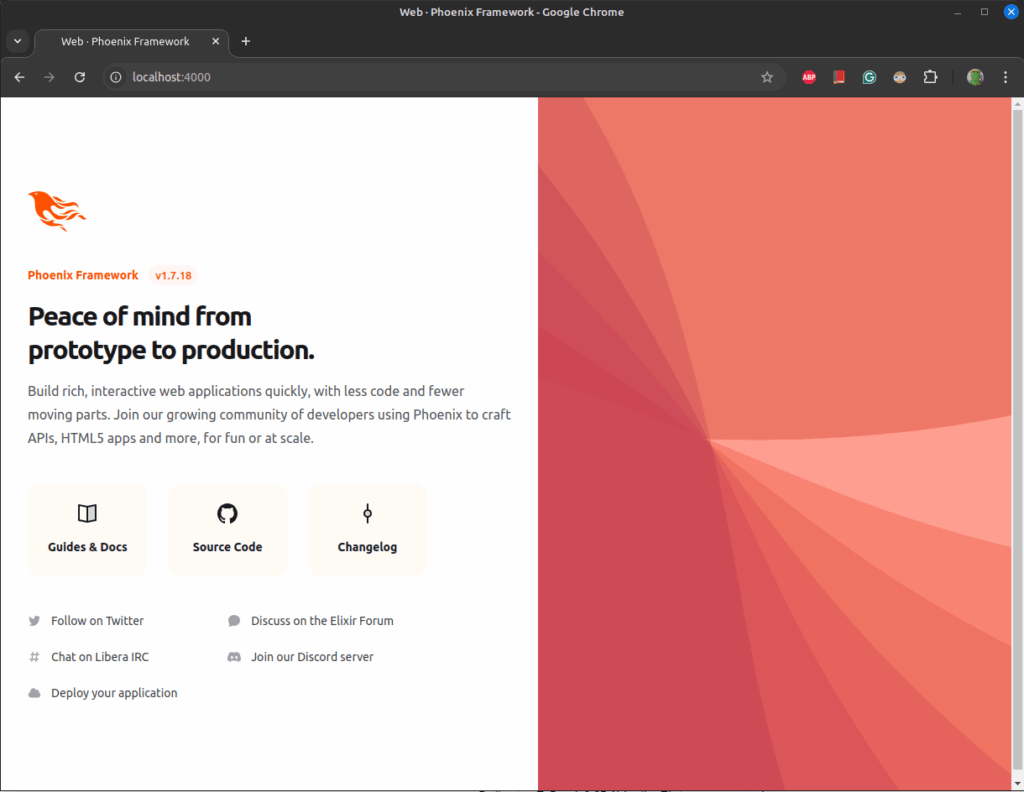
Open a browser and access localhost:4000. The setting is successful when you can see the following page.


Comments